Your eyes are often the first thing that people notice, and we’re sure you want them to look their best. When it comes to makeup, you can make your eyes stand out with jaw-dropping appeal with just a few simple tricks. Makeup can enhance every eye-shape, including hooded ones. If you have hooded eyes and you’re wondering if you can sport an eye-catching look, then take a load off and read on! In this article, we’ll highlight some of the great ways you can get a gorgeous look in a matter of minutes.
Hooded Eye Test
First, find out if you truly have a hooded eye shape. Finding your eye shape isn’t always cut and dry, but luckily there is a simple way to discover if you have hooded eyes. Get in front of a mirror and look into it. Keep your gaze locked straight ahead. Try to pick out a few details. Do you have a crease? If not, then you may have hooded eyes. Ask yourself a few more questions. Do you have skin that hangs over the crease? Is your crease visible? If you have skin that hangs over your crease and the crease isn’t visible, then more than likely you have hooded eyes. Hooded eyes often give the appearance of a prominent brow bone. Those with hooded eyes also don’t have the amount of area those with rounded or almond eyes may have. Don’t be discouraged. There are many ways you can wear the hottest looks and make them work for your eye shape.
Hooded Eye Tricks
When it comes to eyeshadows, many of us are often drawn to deep and dramatic colors. Sultry looks and smoldering gazes are often the result of a play on colors that create depth. Don’t think that hooded eyes can’t take advantage of pigment in awesome ways. There are a few tricks you can use to give your eye makeup look dimension.
The Newbie Hooded Eye Trick
If you’re a novice at putting on eyeshadow and don’t want to go too far, here’s a simple trick you can use. Grab a piece of tape or something with a nice, clean straight edge (you can even use a ruler) and place it on the outer corner of your nose, then connect it to the end of your eyebrow. Once you’ve got a stable grip on this with one hand, you can put on eyeshadow with the other and buff it in. When you’re done you can remove the tape or other straight edge and admire your handiwork!
The Smokey Eye Trick
The smokey eye is a classic look. If you’ve never experienced this look, it’s worth a try. It usually begins with a natural or light hue, followed by a medium shade and then ending with a darker color across the outer eyelid. The effect is typically something that looks as if it is on a gradient. It makes the eye look much more captivating. Hooded eyes may not have as much surface area to do the smokey eye due to the crease being pulled up into the eye when an individual is staring ahead. However, this doesn’t mean a smokey eye is impossible, the method must instead be modified.
- Begin with a nice, clean face. Oils and dirt make it harder for makeup pigments to really shine and also can be responsible for breakouts.
- Once your face is clean, prep your eyelids with a primer. This step is extremely important. Primer helps pigment to adhere to our skin and create a fresh, flawless look. Add in a neutral color (one that is close to your natural color) across each lid to help the colors to pop. As you build, this will help to pull all the colors together.
- Apply your makeup in a well-lit area with a mirror. You want to be sure to see yourself from all angles.
- Look into the mirror straight on. Don’t think about moving your head to the left or right without getting a good, direct view. You want to be able to see how everything looks as you apply it.
- Next, choose a three-color palette that goes well with your skin tone.
- Once you’ve got a set of colors, begin by working the lightest color around both eyes. Try to really get the color onto your skin. You want to build as much as possible.
- Smooth out the first color and then go for the transition color. This is the shade that is in-between the lightest color and the darkest shade. Take a little of the transition color to your lower lash line. This will make the colors meld better.
- Work the transition color not only into your crease but onto both brow bones and past the outer corner of both eyes. This allows the color to be visible.
- Once you’ve blended the secondary color, the next step is to add the darkest shade. Be careful with this one. It is quite possible to add more than you need. To keep this from happening, add a little and blend. Continually blend and take stock of the look. Add the color to the outer edge of your crease and brow bone and extend it a little outwards from the outer edge of your eye.
- It’s important to not go overboard. You want a nice solid build-up that adds dimension to your eye. Once you’ve gotten this down, then you can add a little shimmer into the inner corners of your lids.
The Cat-Eye Trick
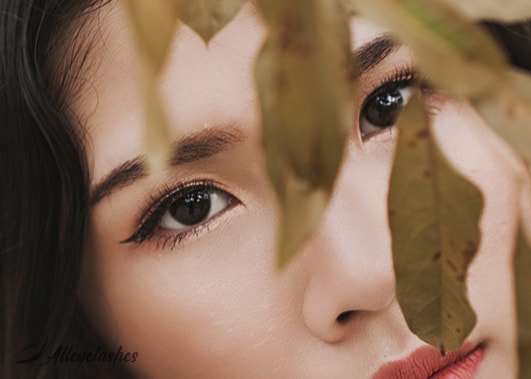
You’ve probably heard that hooded eyes can’t do the cat-eye liner. Well, we say that’s false! You can absolutely rock a sultry, sexy, cat-eye. It’s simple and easy. With a little bit of practice, you’ll get it down pat!
- First, look into the mirror with your eyes open. Remember, you want to expose the area that will be visible to others.
- Next, begin the line at the start of your lash line at the inner corner of your eye. Take the color to the end of your eye, where the fold ends.
- Now, pull the fold gently upwards. Extend the color line past your fold and outwards. Trace over the line to ensure it is nice and dark and that’s it! You’ve got a great cat-eye look.
The Best Hooded Eye Cut-Crease Trick
Believe it or not, hooded eyes can have great cut-creases. It just takes a bit of practice, some good make-up, and the willingness to break a few rules. Most cut-creases emphasize the actual crease and while that’s all well and good, if you have hooded eyes your crease isn’t visible. The best way to go about it is to create a “false” crease.
What Is a Cut-Crease?
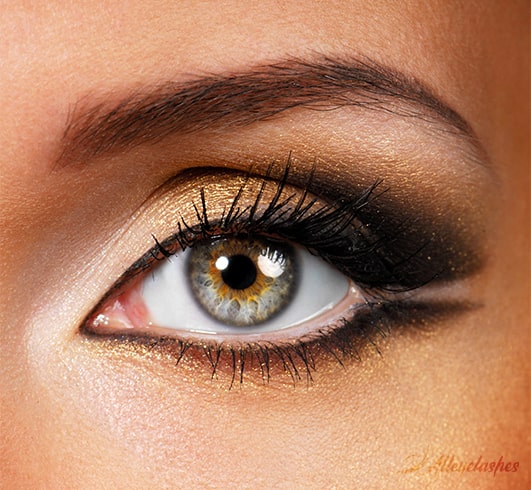
Similar to the smokey eye, a cut-crease is a way to create depth and dimension on the eye. However, the smokey eye is all about a gradual transition, while a cut-crease sharply defines the line between colors. This can captivate those who look at you, making your eyes look mysterious, sexy, and alluring. In a cut-crease, eyeshadow is used to emphasize the area where the skin goes into your eye and creates a crease. By making this line more prominent, makeup artists and style mavens can make the eyes seem bolder and more captivating.
The Process for Creating a Cut-Crease for Hooded Eyes
- You can make a new crease by extending the surface area of your eye. You do this by cleaning up your eye area. Sweep your eyebrow hairs upward with a fresh spoolie brush, then you can fill in and redefine your brows.
- Next, using a flat concealer brush, use a concealer to highlight the area underneath your brows and across your lid. This gives you more area to work with. Set the area with loose powder. Don’t skip this step as the concealer on your lid may pool inside the crease.
- Highlight the area right below your brows with a light, neutral color. Now, you must find your socket line. To find your socket line, use your finger to feel where your brow bone is. This will be where your new crease will be.
- Choose a nice, dramatic shade that goes along with your skin tone. Place this pigment along where your brow line is and along the outer corners of your eyes. Blend it in smoothly.
- Take a bit of concealer on a brush. In a downward motion, swipe the concealer across your inner eye towards the middle of your lid right beneath your brow bone. Blend it in. What you are doing in this step is “cutting your crease.”
- Set the cut with loose powder and sharpen your crease a bit. Do this by darkening the line along your brow bone with the same dramatic color you used before.
- Use a light, shimmery color on the inner lid and extend this to nearly the middle of your lid. Blend well. Choose a transition color to go in between the color on your inner lid and the dramatic shade at the outer corners of your eye. Blend the color in.
- Don’t forget to line your lower lash line with the dramatic color. This draws others’ eyes upward and gives the illusion of a crease. Dab a bit of shimmer along the inner corner of your lower lash line as well.
- Finish up by adding liner and if you like, false lashes. Finish the entire look off with a coat of mascara if this is the vibe you’re going for.
Now that you have a few tricks up your sleeve, don’t be afraid to be daring and bold. Remember that hooded eyes are just as beautiful as any other eye shape and getting a good makeup look isn’t hard, it may just require some simple modifications. You can sport any number of great makeup looks with a bit of practice and patience.


